
.svg)


Why You Should Keep Making Stuff By Hand
I work with CoLab, IDEO’s tech-focused R&D group. I’m also someone who’s committed most of my life to craft. Luckily, my day job allows me to bring the two together. But the minute you start making a living from your craft, problems start to surface. You get burnt out. You compromise your vision to deliver things on time. At that point, you're no longer transforming objects—you’re just pushing matter around.
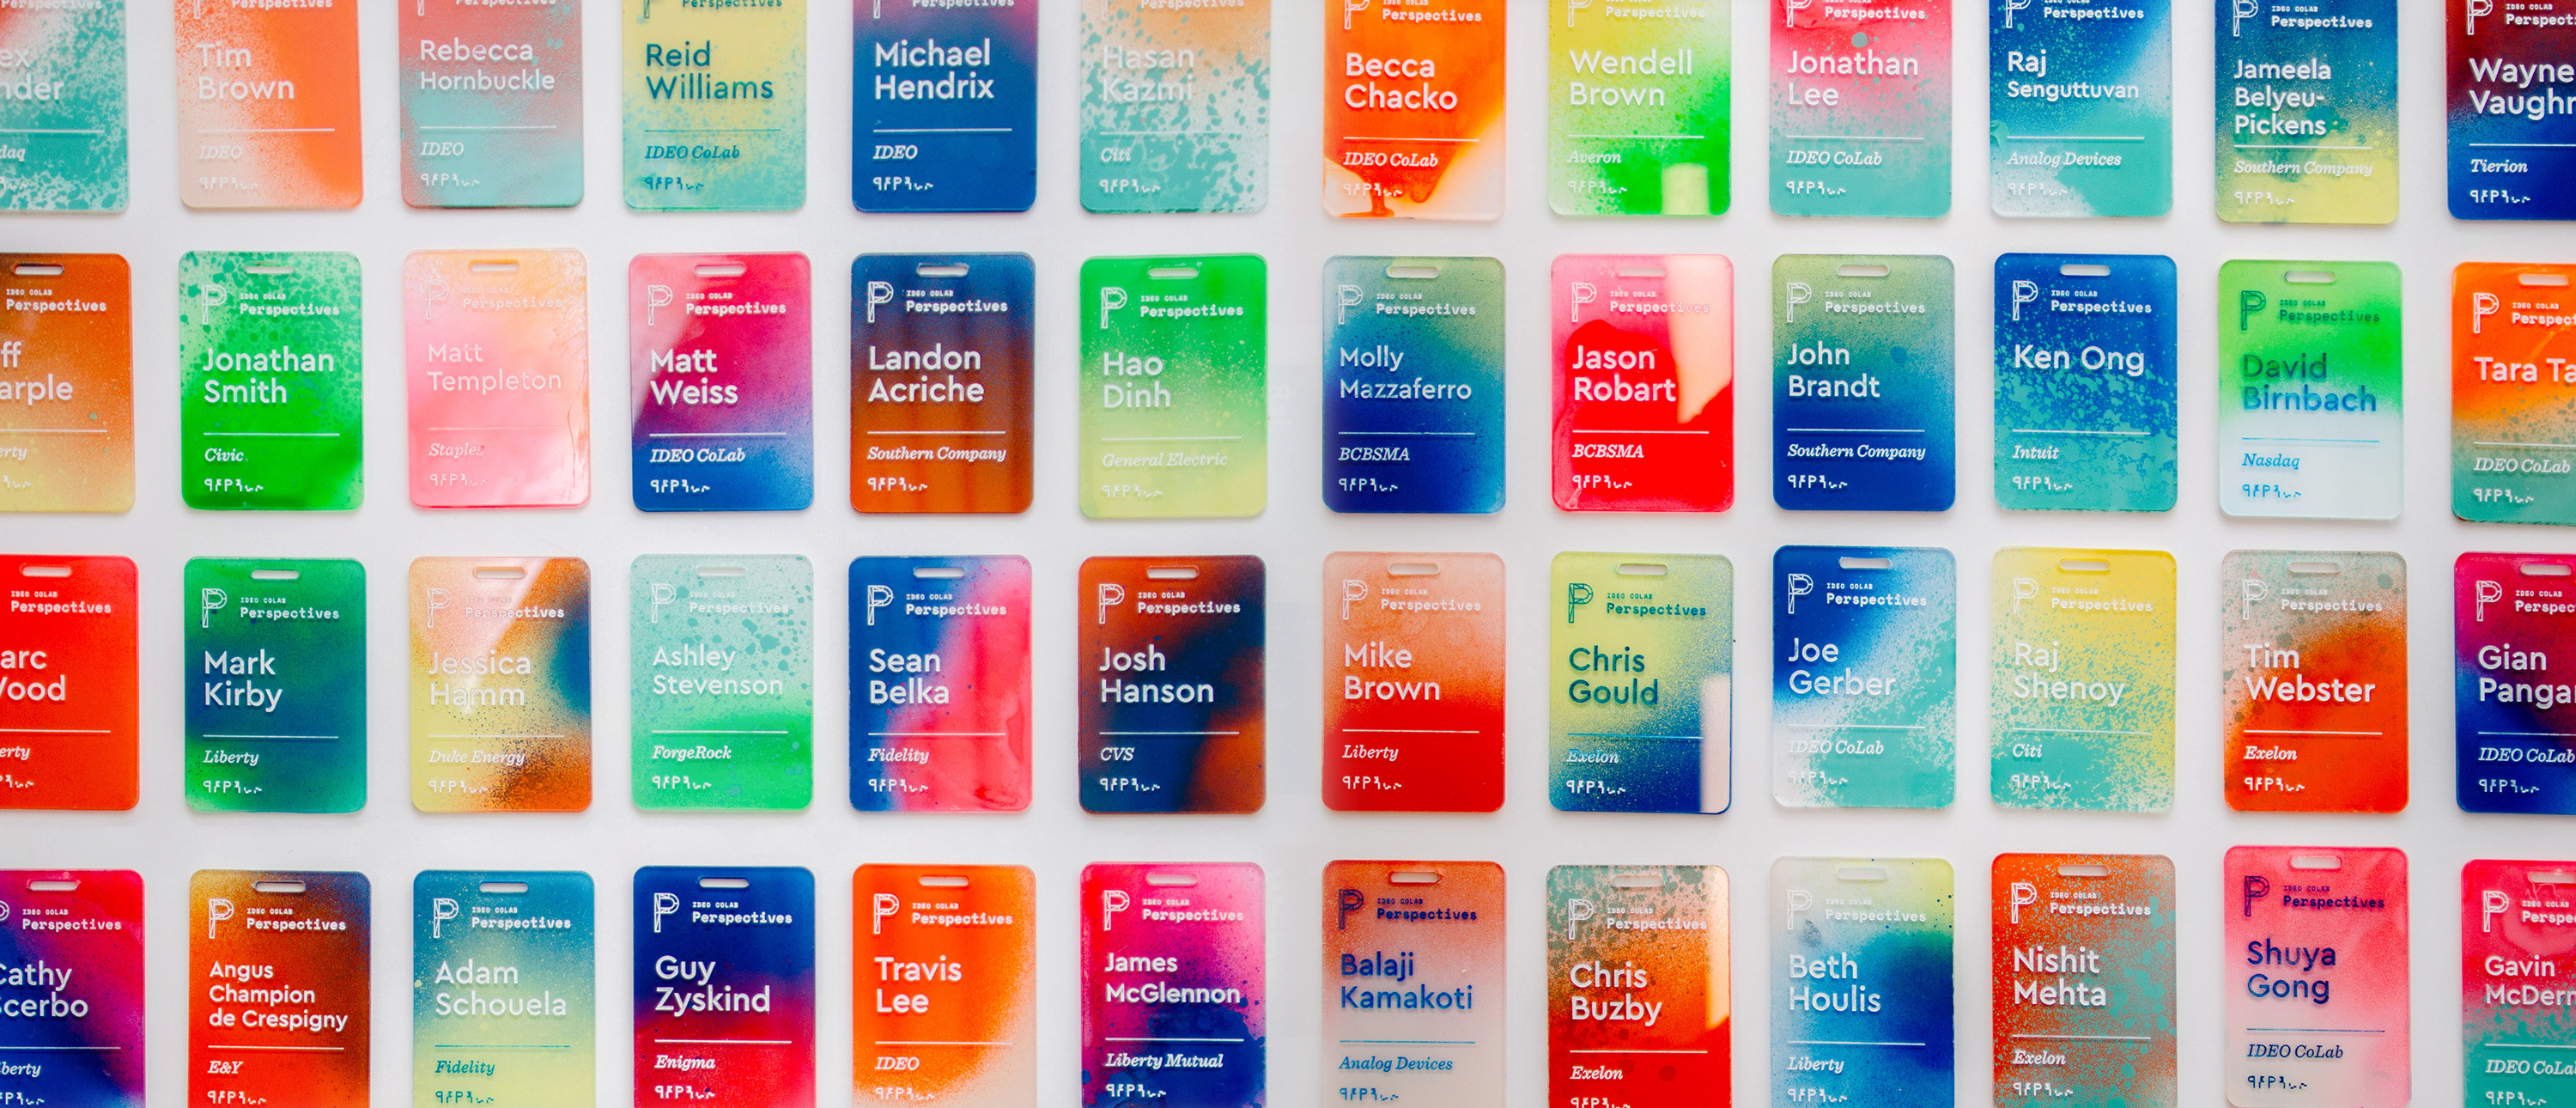
So, when the opportunity comes up, I like to turn off the computer and focus on creating artifacts. While an object is just a thing that serves its purpose until it’s tossed out, an artifact sparks an invisible conversation, a connection between the human who made it and the human experiencing it. Even something that people don’t think twice about, like an event name tag, deserves to be well designed.
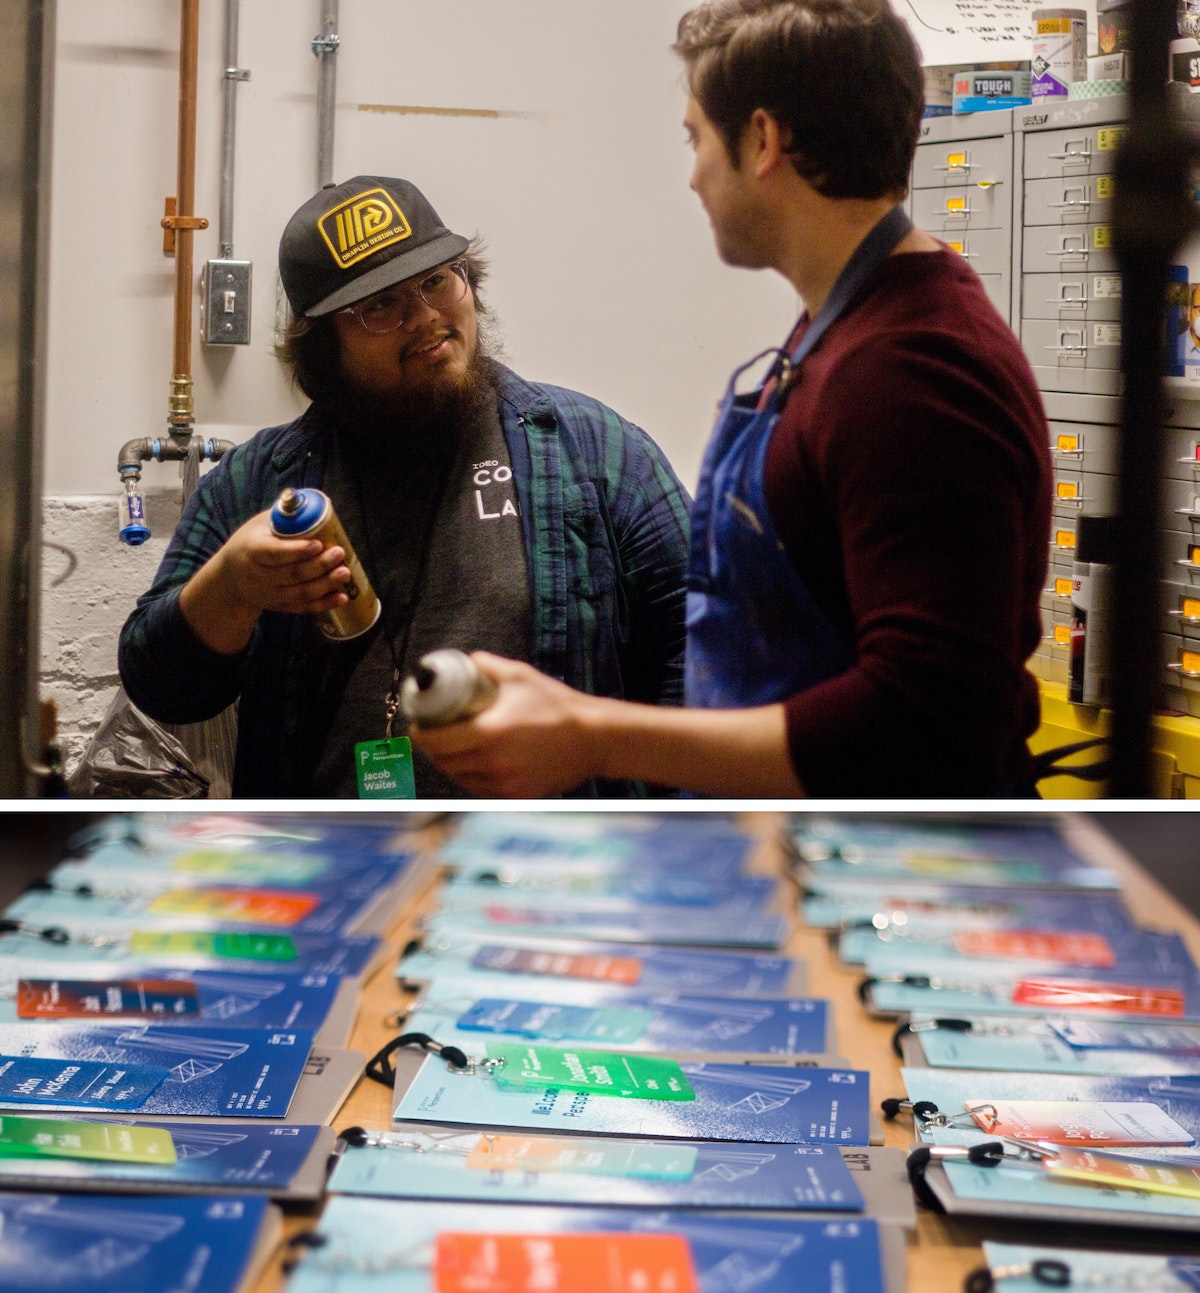
That belief drove me to create a collection of one-of-a-kind name tags for a CoLab event. I wanted to make something with my hands that would bring a level of craft to our content. The tags served as the icebreaker for more than a few conversations, and reminded people at the tech-focused event that there's a human element to everything. Many attendees we reached out to a month later said that they still had the tag on their desks.

The process was simple, but arduous: I laser cut blanks, etched the names, spray painted each tag using unique colors and angles, and finished it off with acrylic screen printing ink to make the names readable.
Here's how I did it, step by step:
1. Creating the blanks
I designed the negative of the template so that I could later use it as a jig. I used 18 x 24 inch sheets of 3mm acrylic, so that with the name tags at 2.5 inches x 3.5 inches, I could fit about 32 comfortably in each batch (as opposed to 38 if I used all available space and threw away the negative).
Acrylic sheets tend to melt and then cool quickly in the laser cutter, leading to possible sticking, so I usually add about .2mm to my thickness settings to compensate (i.e. I was using 3mm acrylic, but put 3.2mm in the settings). There are two benefits: One, you guarantee that you actually cut through the sheet. Two, it also gives you a little bit of wiggle room so you don’t end up with hard to pick out joints.
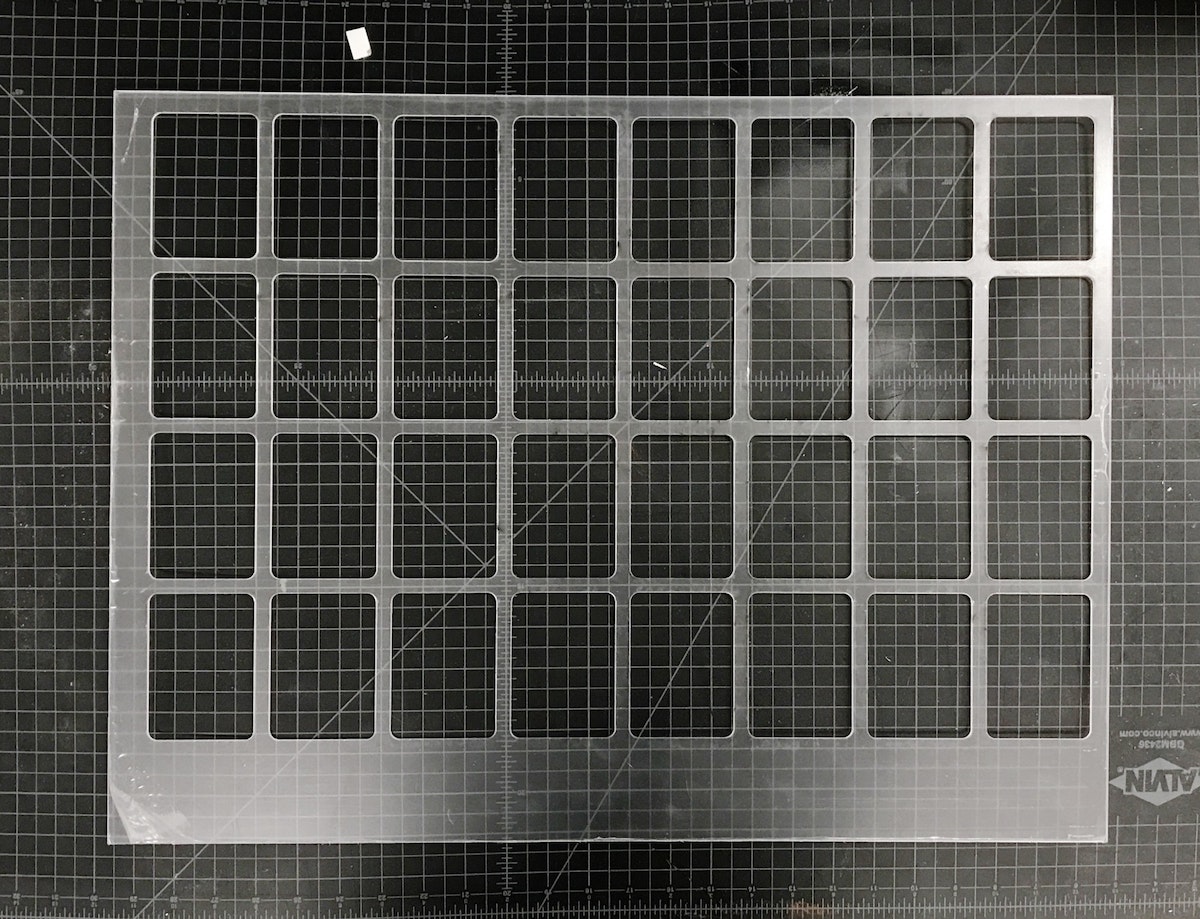
Pro tip: The key to making the most of your acrylic is to leave space for future cuts on the same piece. Instead of designing my reusable jig with all the name tags in the center, I threw them to one side so that I could use the other end again. After I cut the jig, I could get 38 tags out of each subsequent batch because I could simply throw away the negative. Another bonus: When there’s excess acrylic on one end, you can always tell which side goes in which direction.
2. Etching the blanks
Once the blanks were cut, I needed to take the protective plastic off of one side, so that I had a clean surface to etch onto. I peeled the tags, slipped my template jig back into the cutter, and dropped the blanks into place.
The etch file is the same as the template jig, just with a red cut box around the perimeter of the file denoting the edge of the acrylic.
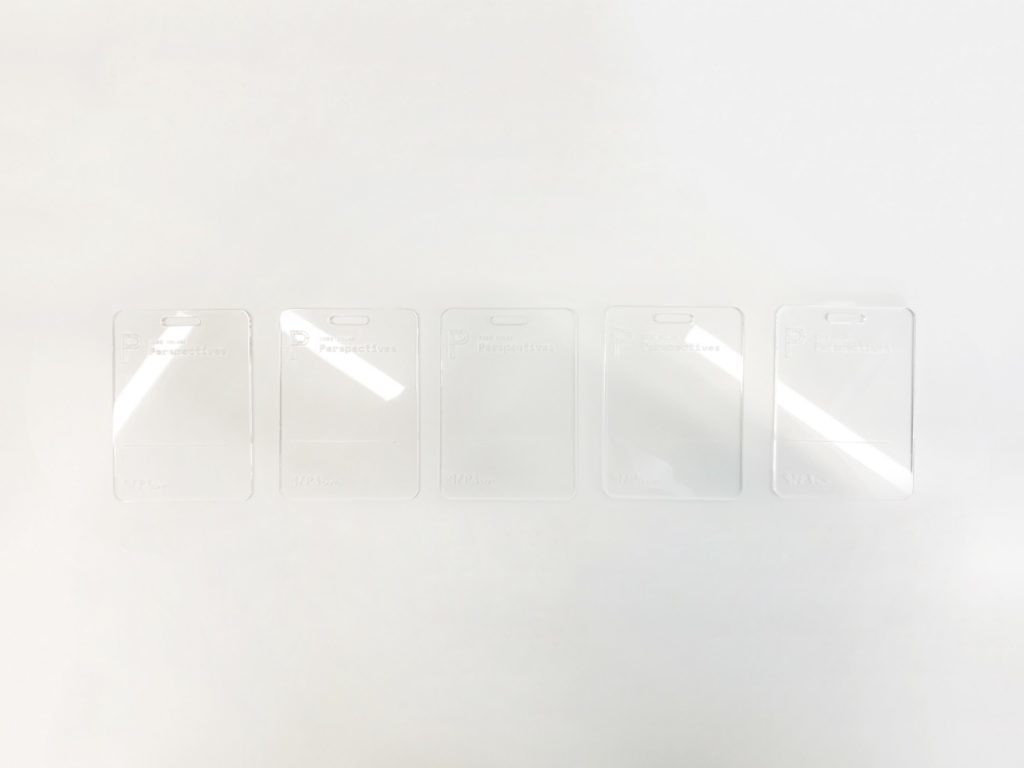
Once I had an etch file ready to go, all I had to do was push the file to the top left of the cutting area and check the focus points of the laser on the first tags on the first and second rows. Since the etch file is in the same grid form as the old cut file, everything is already spaced for me. The etch settings held ink best at around 74 to 76 percent power at 100 percent speed.
One final thing to note: We don’t want to cut anything (we’re just etching), so after setting my etch power, I set the cutting lines to 0 percent power and 100 percent speed, so we just blow right past them.
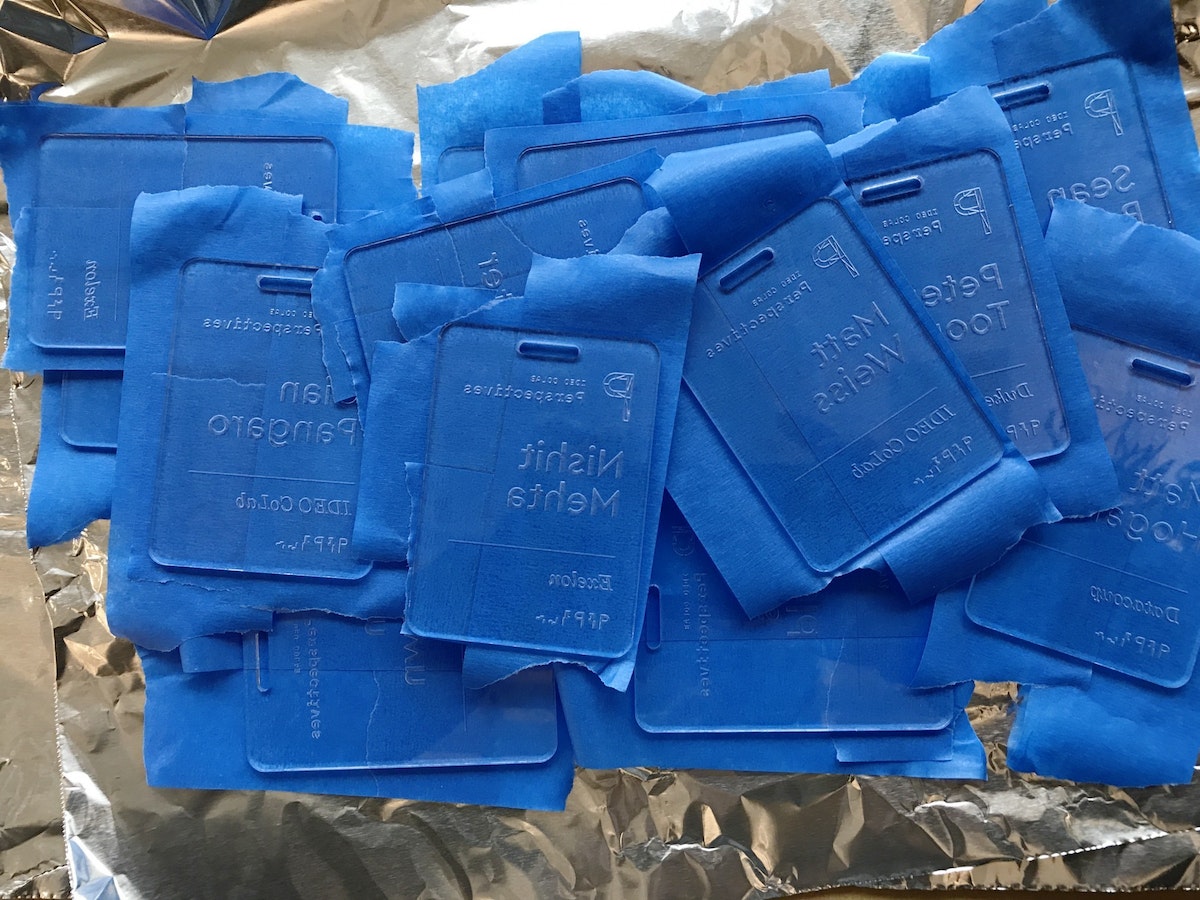
3. Taping the etched tags*
Once the blanks were etched, I peeled the plastic off of the back of the tags, then covered the etched side of each in painters tape to keep them clean.
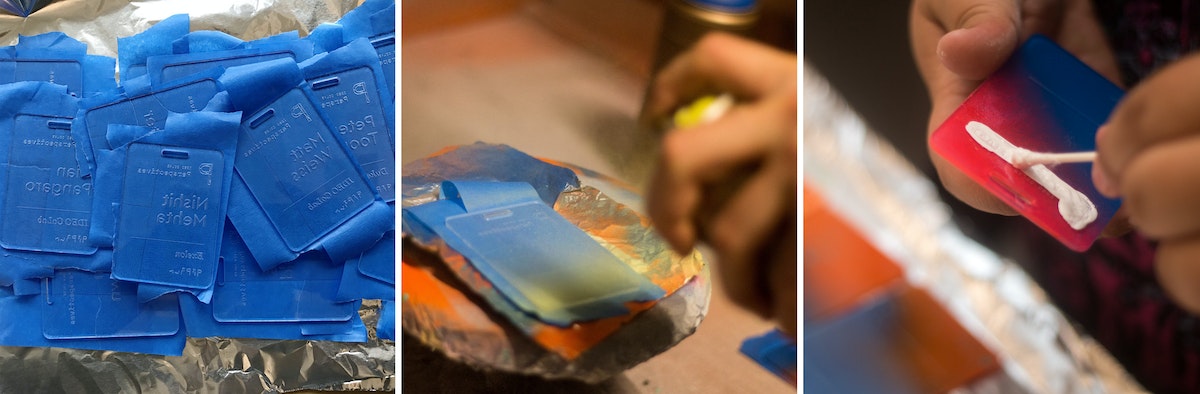
4. Spraying the tags
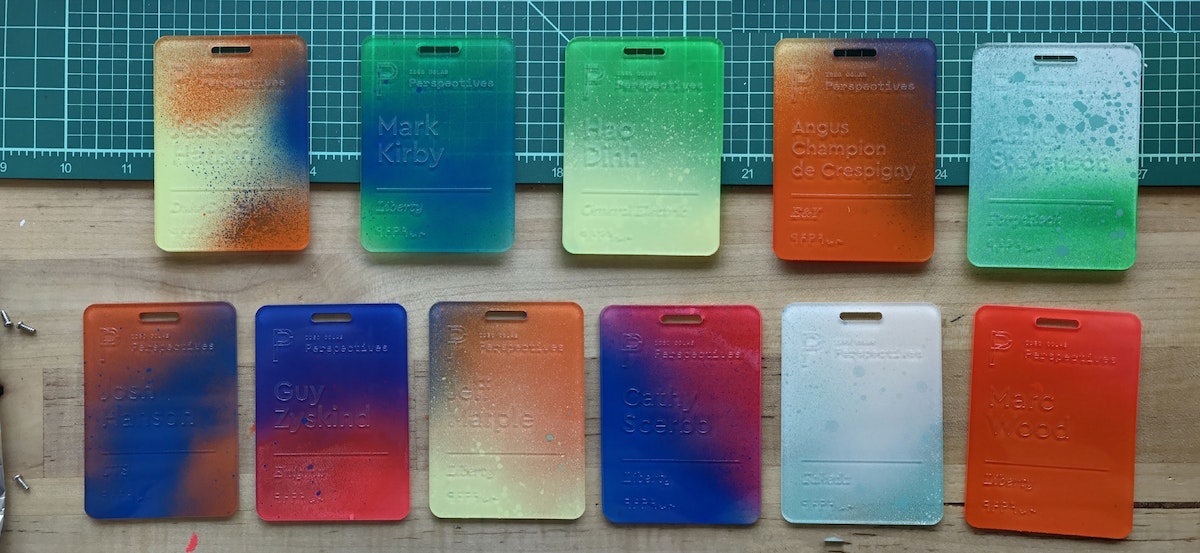
After everything was taped, I slapped some aluminum foil in the vent hood and got to work spraying each tag. The process allowed me to bring out some of the old airbrush tricks my dad showed me as a kid, like holding a tongue depressor at a 60 degree angle in front of the nozzle to create thicker splatter. I used two to three colors for each tag, at varying angles.
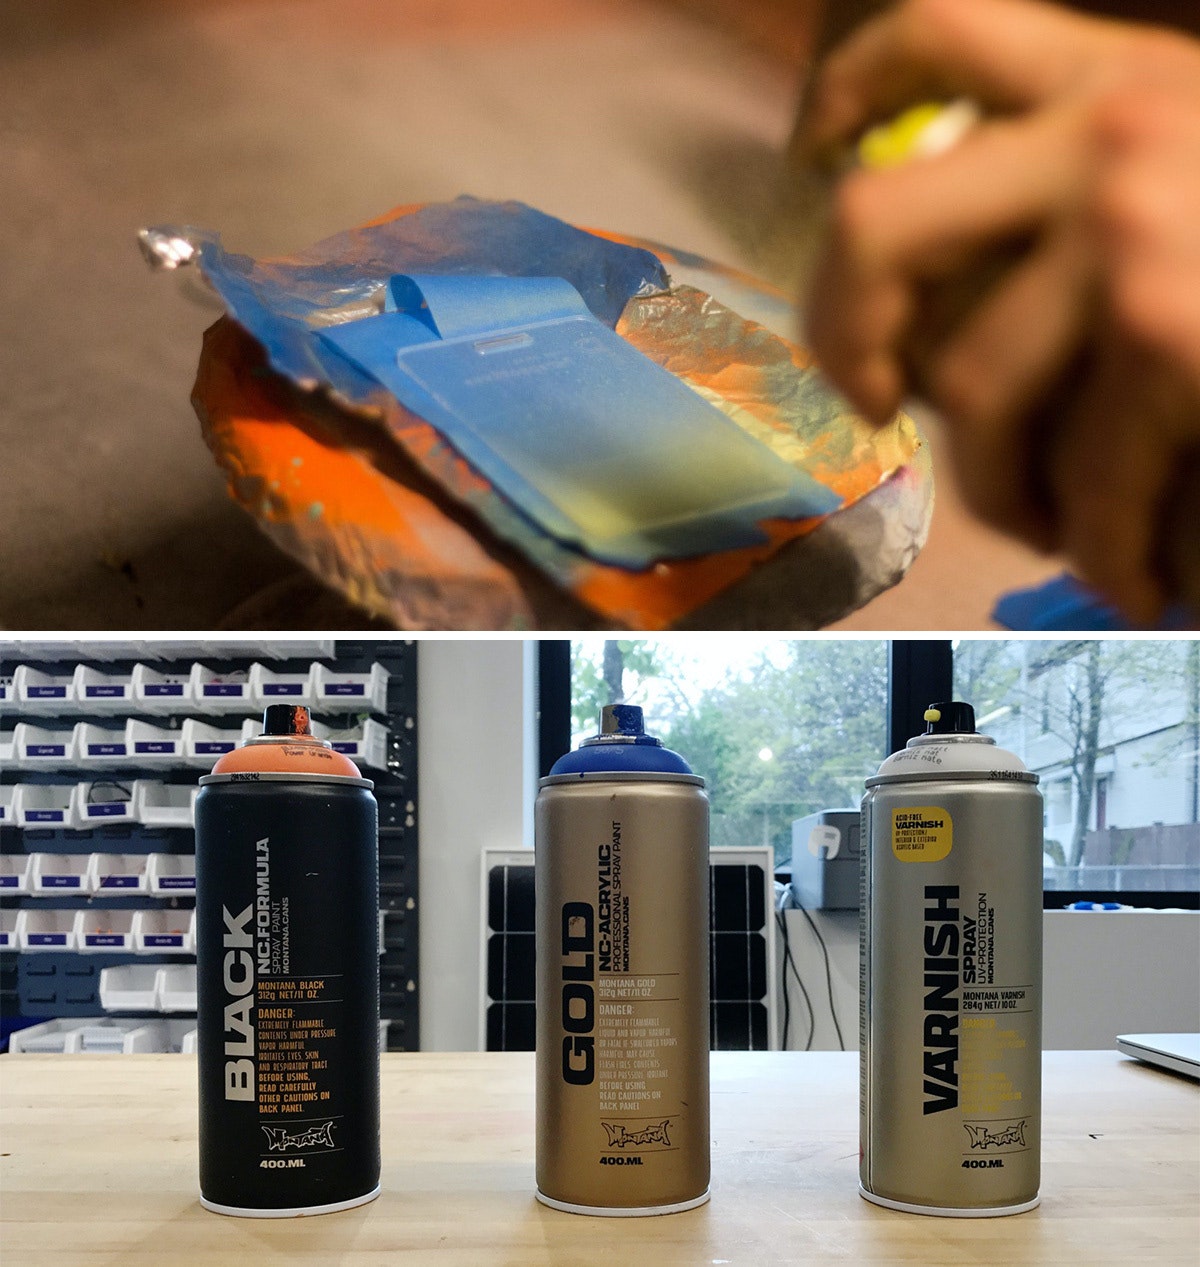
I used Montana brand spray paints, and I definitely recommend using the BLACK formula. Over the course of the project, it dried on the acrylic within four and-a-half minutes, which is pretty insane. The GOLD formula was comparable, but my run of the mill Krylon paints took much longer, so it’s worth the extra bucks to buy Montana.
Pro tip: If you’re spraying a bunch of parts in a hood, aluminum foil is actually a great material for coverage as it tends to not stick to your parts like paper.
5. Sealing the tags and revealing the beauty
After the sprayed tags had dried, I hit the painted side with a couple quick coats of the Montana clear matte varnish so that they wouldn’t stick to each other. When everything had dried, I peeled off the painter’s tape—my favorite part of the project.
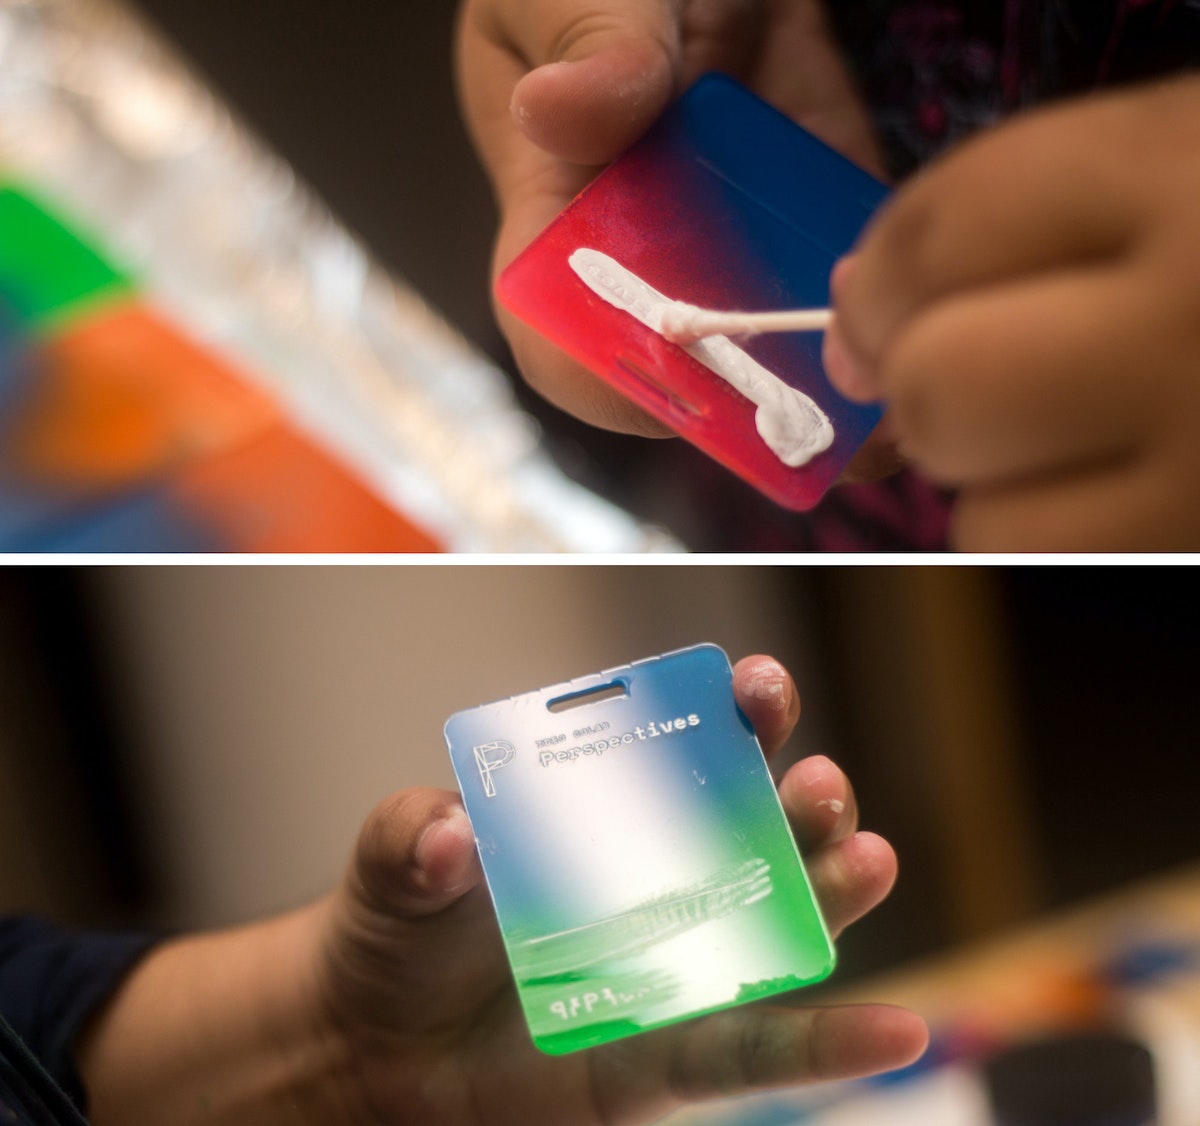
6. Applying the ink inlay
Next came the most time-consuming part: the ink inlay. I used speedball acrylic screen printing ink for its fast drying time, and how easily it wipes off acrylic. I liberally brushed and swabbed the ink into the etch using a Q-tip, then quickly wiped the excess off with a paper towel. Once dry, they were ready to go.
That's it!
*Imperfect process: I know what you’re thinking—why didn’t you just remove one side of the plastic before etching, spray that side, then remove it from the other side, then etch that? I did! After a few batches, I added the taping step because I noticed the spray paint was eating away the plastic coating that kept the paint off the front of the tags.
Words and art

Subscribe