
.svg)


The Big Green Button
Few things are more satisfying than wrapping a months-long project. Back when the New York office tracked its active projects on a whiteboard in our kitchen, we’d celebrate these completed projects at our weekly meetings. Each team would walk up to the front of the room and—as the rest of the studio clapped and cheered—triumphantly erase their project from the board. It was a small thing, but it was ours, and it was pretty satisfying.
Fast forward a few years and the big whiteboard has been replaced by a nimble digital tool that allows us to track and collect data about our projects, leads, and teams. Fantastic—except we lost the communal hoopla of physically erasing the board in front of our friends. Somehow clicking to archive didn’t have as much pizzazz.
What could we create that would provide that same, satisfying sequence of tangible action and group celebration in our now purely digital reality? Enter the Big Green Button.
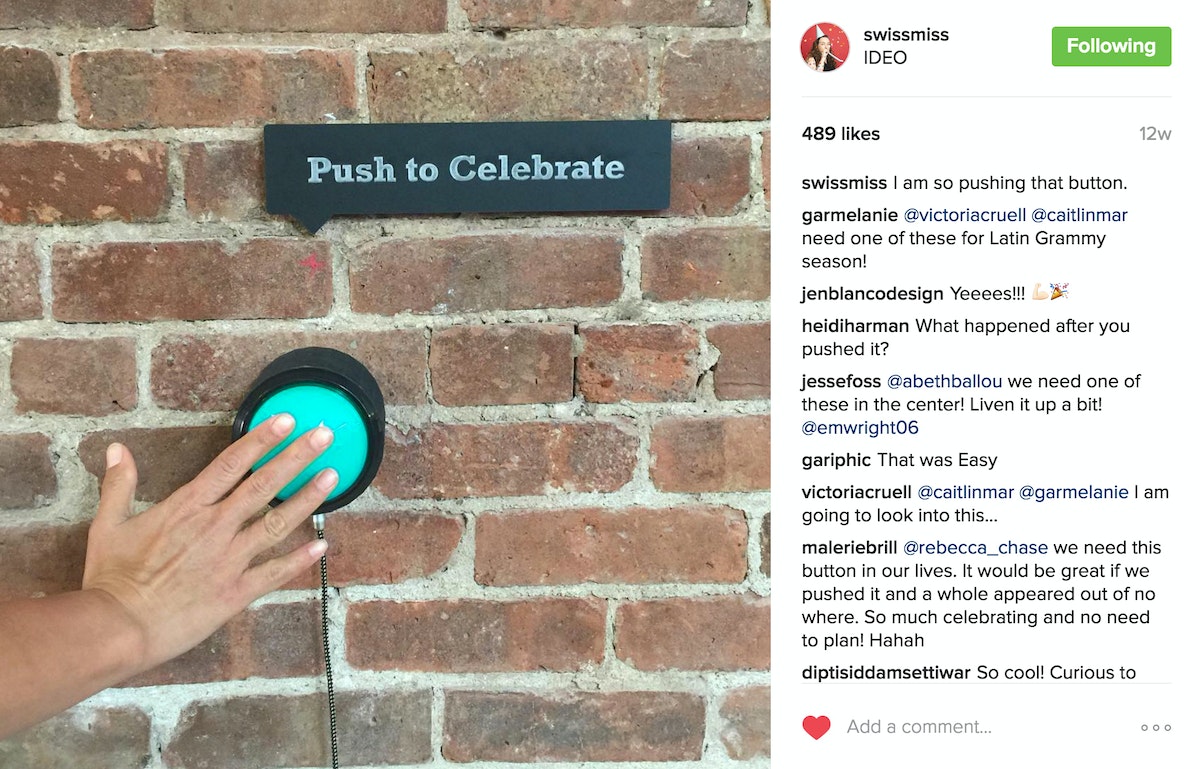
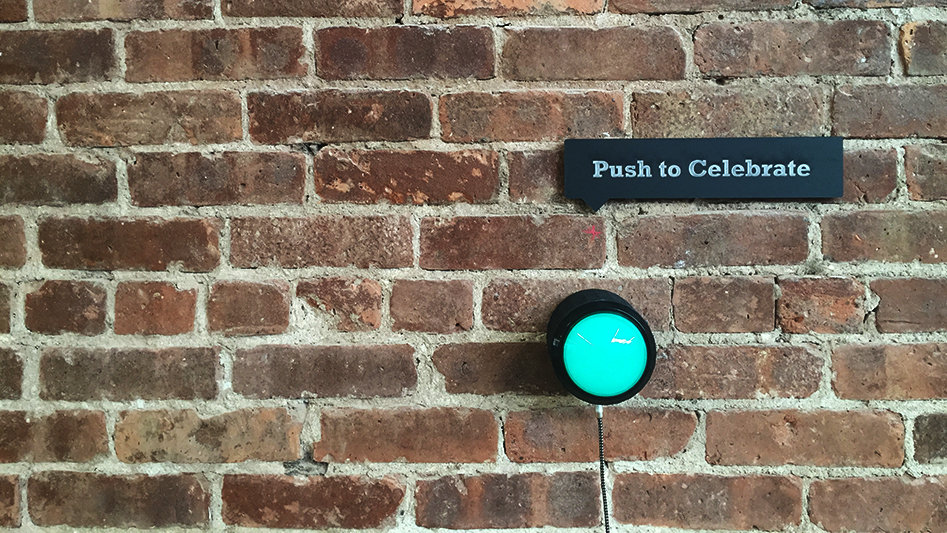
It’s exactly what it sounds like—a massive green button that says “Push to Celebrate,” affixed to the wall next to the large monitors that track our projects. When a project is complete, a team member hits the button and a ridiculous animated gif overtakes the displays while music from "The Price is Right" plays over the speakers. It’s not confetti cannons, but it's fun and triggers the same enthusiastic cheering we enjoyed at the whiteboard.
So how did we do it? Here's the step by step.
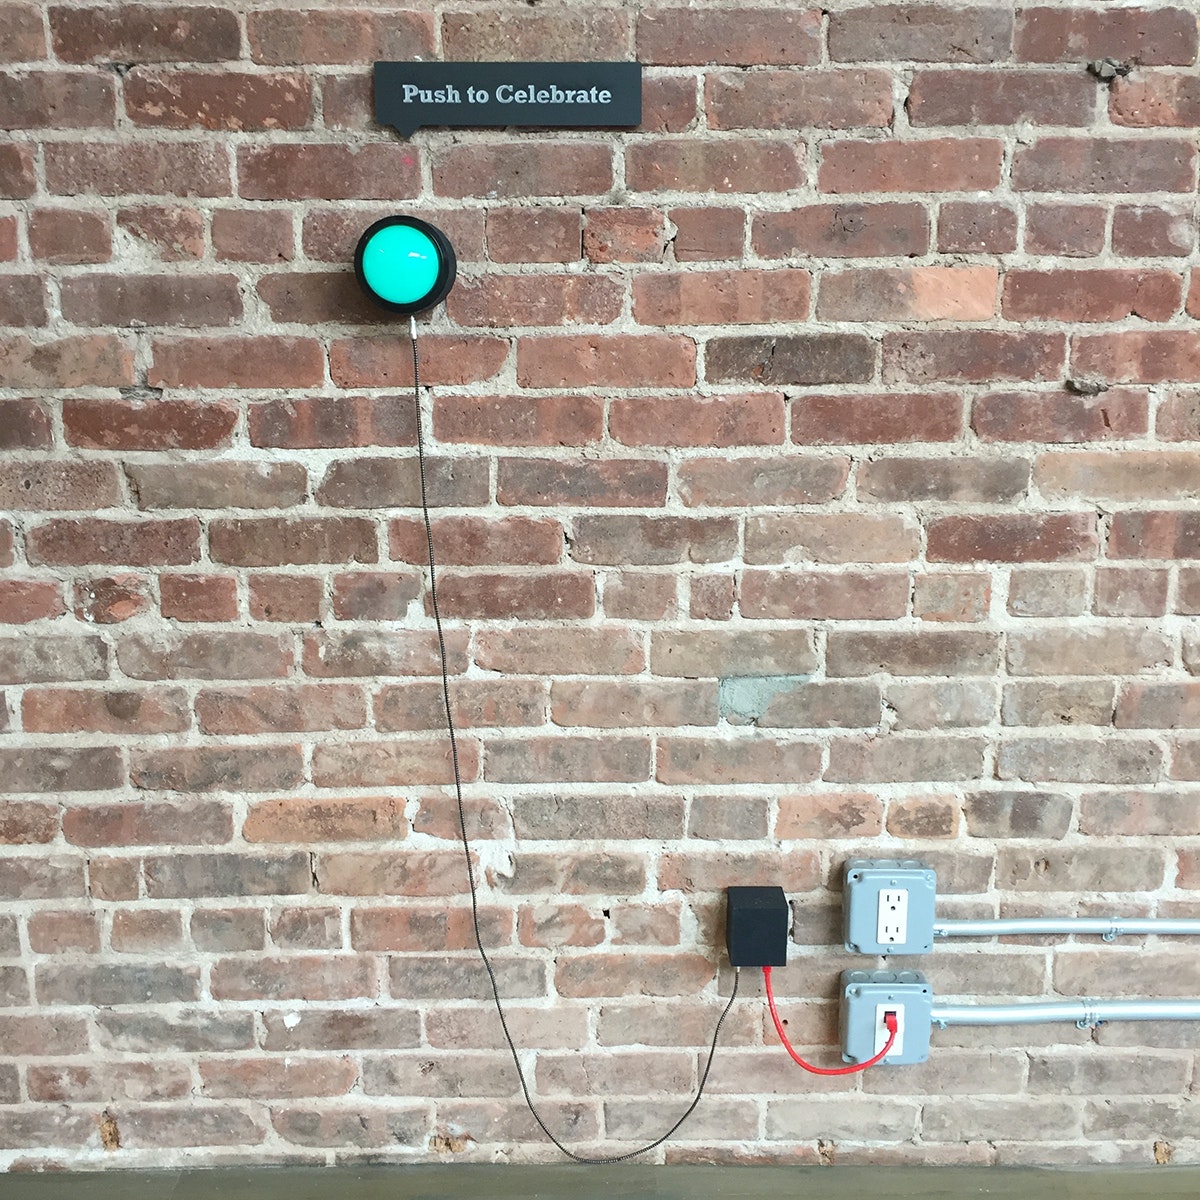
The button itself is from Adafruit, and it’s huge. (Think the size of a grapefruit). The housing for the button is a 3D printed cowling that encases the button and the wiring and connects via an aesthetically pleasing audio cable. The audio cable allows us to unplug the button easily—no complex wiring to worry about.
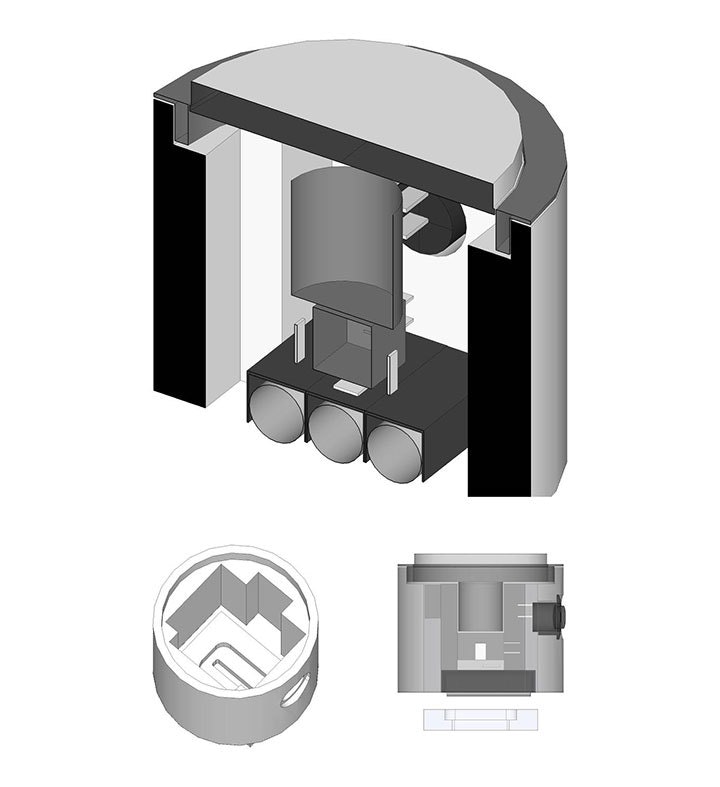
At the other end of the cable is the brains—an Arduino with Adafruit’s ethernet shield. It receives the signal from the button, then sends out a POST request to the website’s server, which runs on IDEO’s network. Because multiple people can view the website at any given time, the user must locally “arm” the button on the AngularJS website with an option box. The option box tells the website that this website will respond to button presses. The go server running the server can then route the incoming request to the large screen’s website only.
This whole setup uses only a few lines of code to add a physical layer and a heightened level of excitement to our project completion ceremony—and everyone loves it.

A button like this is just asking to be pushed, but we added the sign to give people an extra nudge, and a hint as to what it actually does.
Words and art

Subscribe