
How to Make Cinemagraphs with Your iPhone

I’ve always loved cinemagraphs—those endless, hypnotizing loops where part of the frame is still while some areas are gently in motion. When I discovered that I could create these loops natively with iOS 11 (iPhone 6S or newer), I couldn’t wait to try it out.
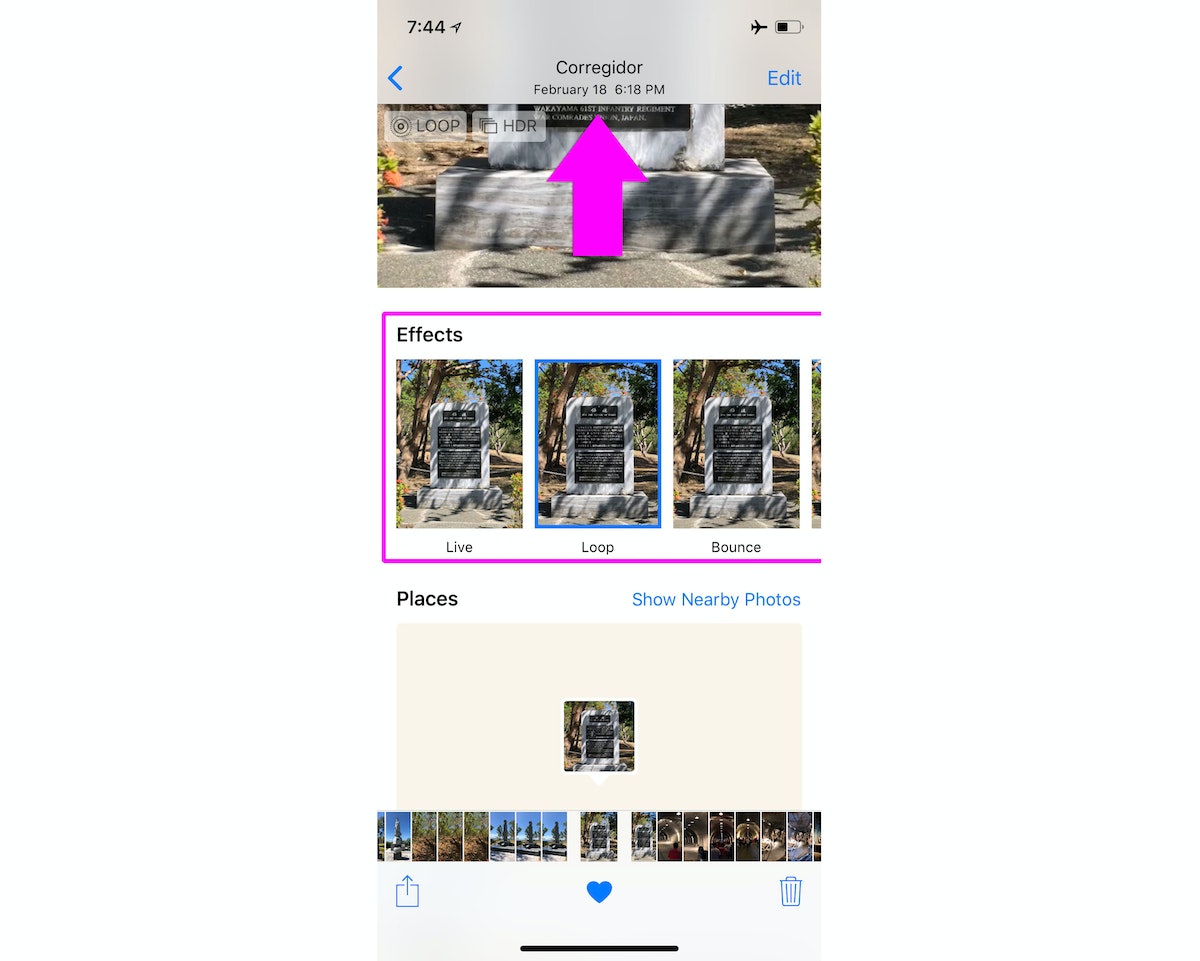
The secret is in iOS 11 Live Photo Effects. To make your own, access this feature, take a live photo, then, in the photos app, swipe up to reveal the Live Photo Effects.
Easy, right? Yes and no.
Creating a live loop is easy, but creating a cinemagraph requires a bit more planning. The difference is in the framing—too much movement, and you’ll just get a live loop. Here are a few tips to ensure you nail the combination of still photo and limited motion:
- Find the shot: To create a beautiful cinemagraph, find a shot where most of the image will be still, and only a piece is in motion—perhaps a tree blowing in the wind, or raindrops on a puddle. If there’s too much movement in the frame, the shot will feel chaotic.
- Plan it out: While it’s possible to pull off a clean loop without a tripod, don’t just point and shoot. I like to turn on the grid in my photo settings—these lines help me see if I’m holding still or wobbling slightly (I always use the grid to help create a level horizon or position subjects, anyway). Try to lock your body by leaning on something, or even by putting the camera on a table to keep it as still as possible.
- Stage it: Don’t leave it to chance! When you can, control the shot. The pool shot below took a few tries, and it really helps that there were no other people wandering through.
Sharing the live loop
So you’ve perfected your technique and have a gorgeous loop to share! The problem is, iOS doesn’t exactly make it easy.
If you try to share natively to Instagram, it’ll tell you the loop needs to be three seconds or longer. And iOS doesn’t offer a lot of options to help—there’s no easy way to export your Live Loop into a format that’s shareable for Instagram. I found this out the hard way while I was traveling in the Philippines, and since I didn’t have my computer with me, I had to figure out a way to solve for this using only my phone.
One of my goals was to use only free apps—buying a bunch of apps I wasn’t sure were going to work didn’t sound very fun. After much Googling, trial, and error I created the workflow below. The first time through might take you a few minutes, but now that I’ve done it a few times, I can go from live loop to Instagram in less than two minutes.
Get the apps
First, download these three free apps:
- Lively: Exports your Live Loop as a video
- Splice: A free video editor that lets you extend the length of the loop to meet Instagram’s minimum requirements
- Video Crop: Removes any letterboxing (black bars) in the video export
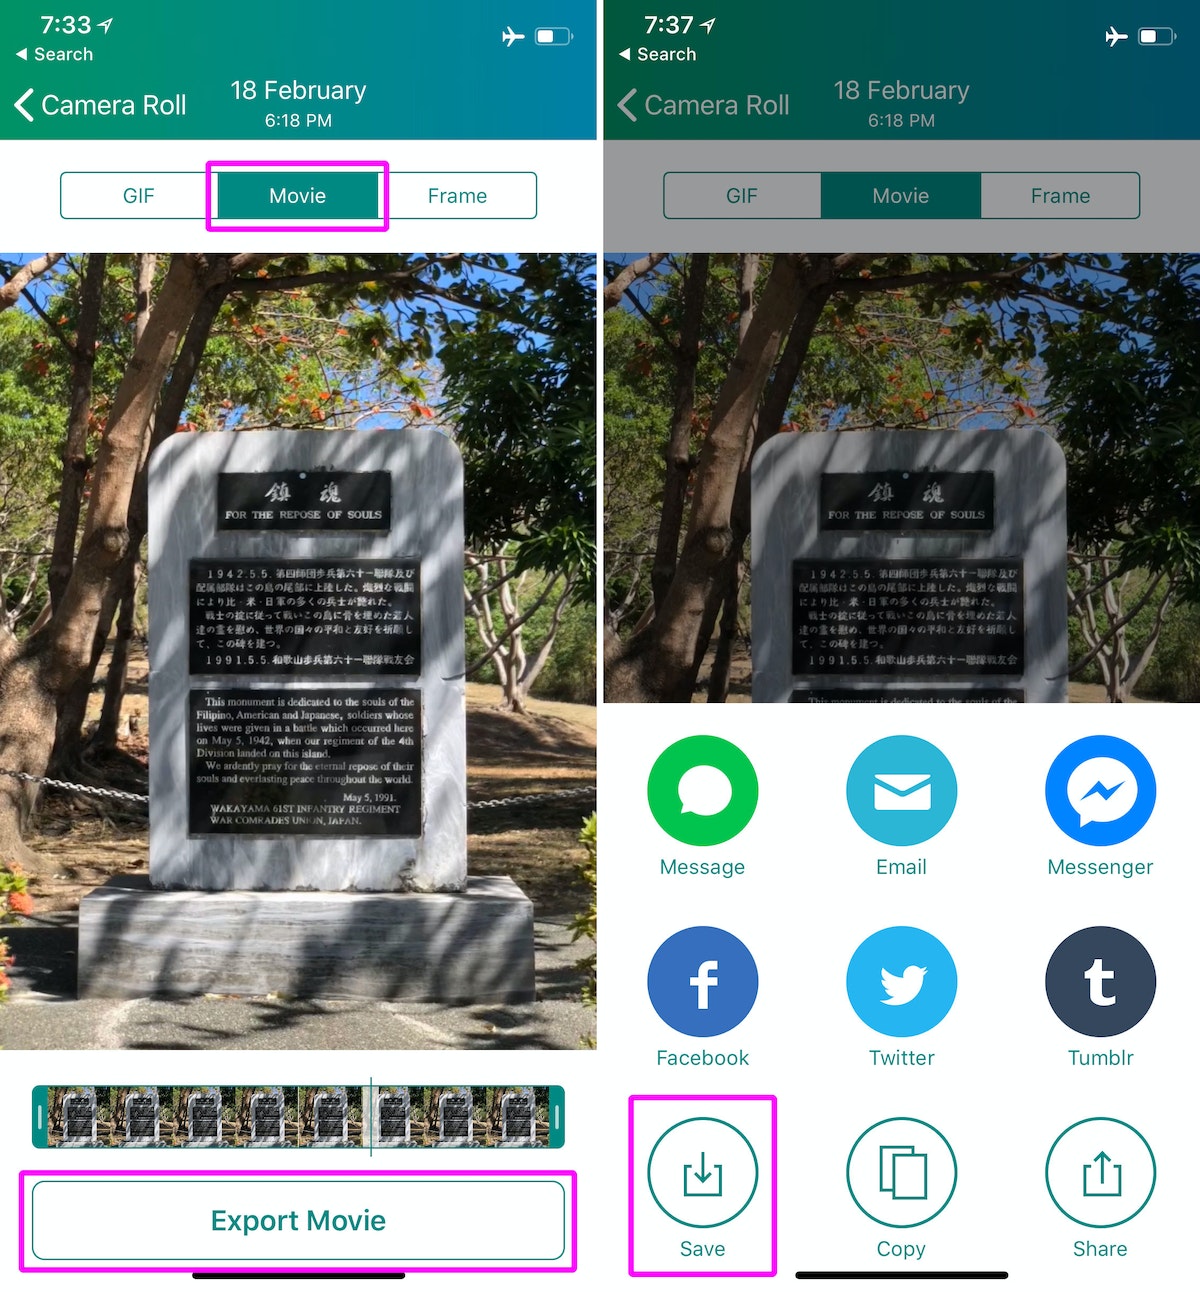
1. Lively
Start by using Lively to open the loop you want to export. In the top of the export panel select “Movie” and then tap “Export”, then save the movie.
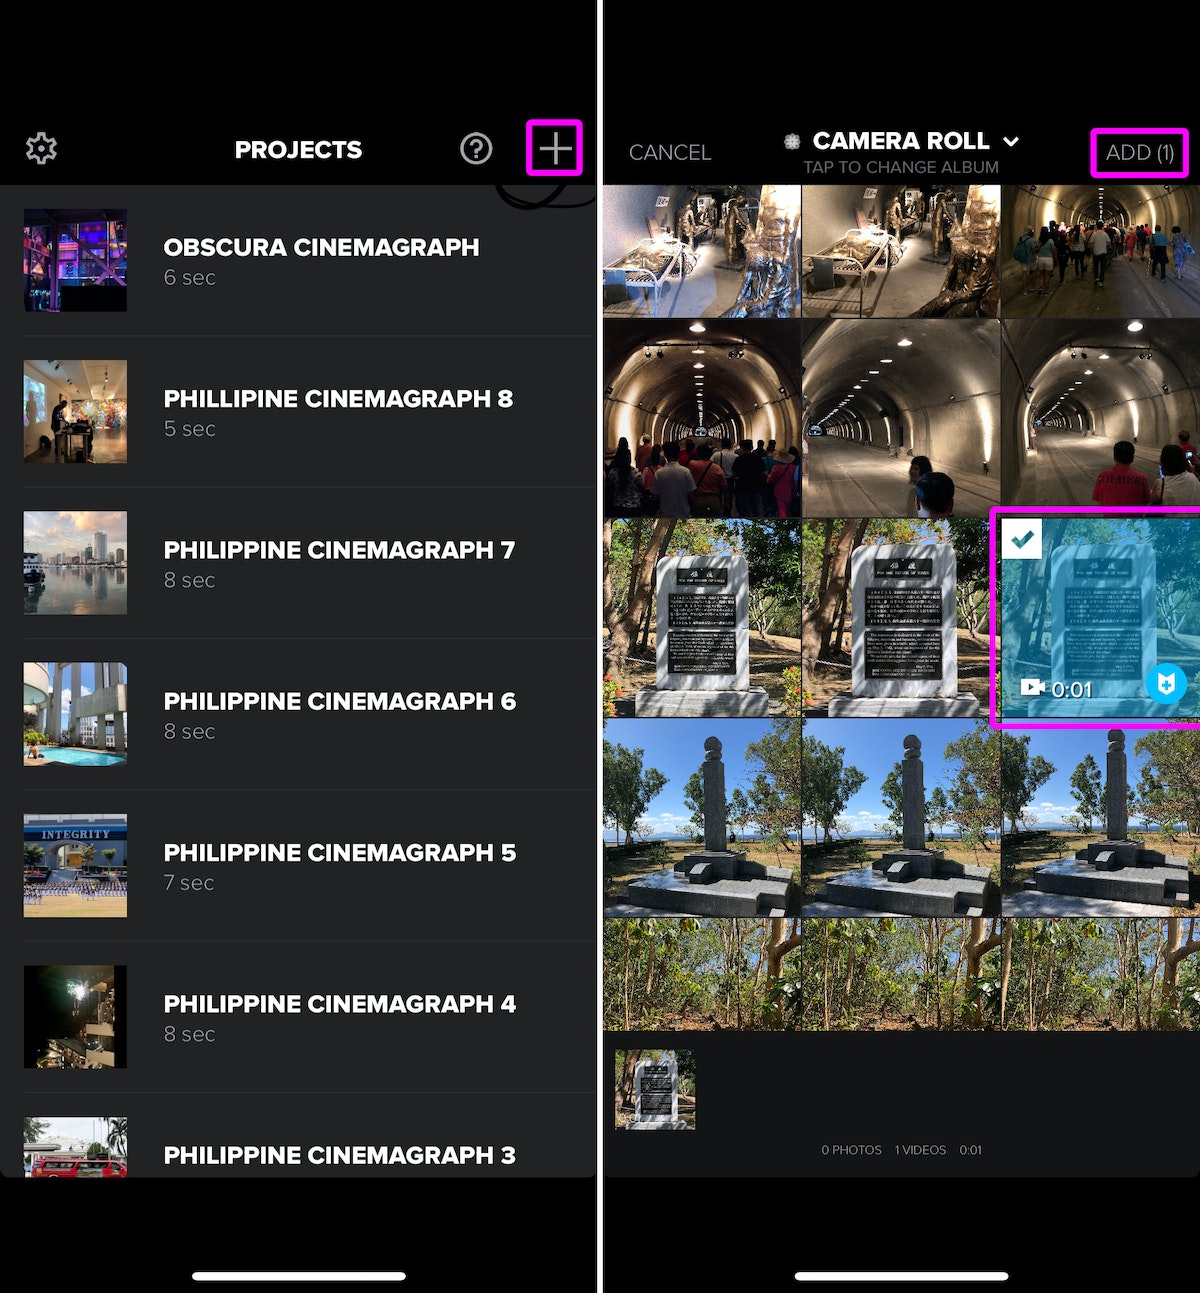
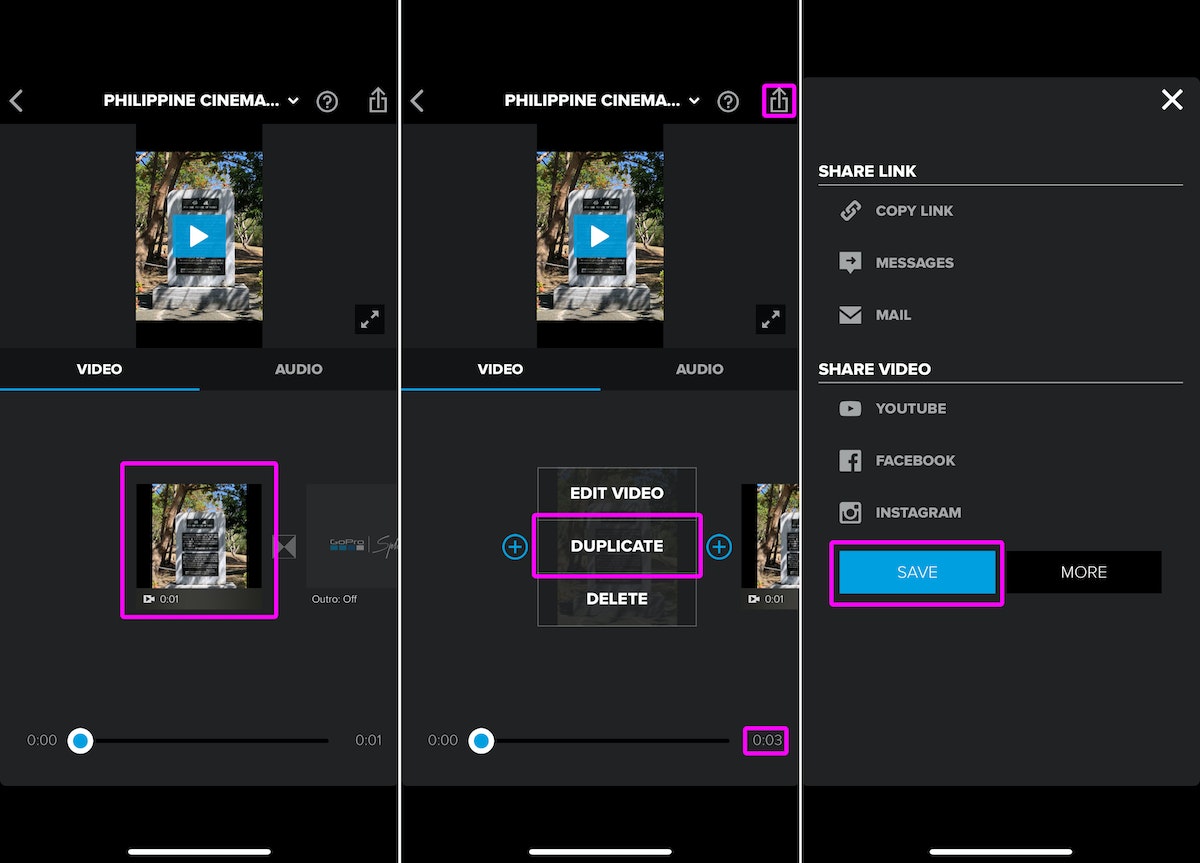
2. Splice
In Splice, tap the + icon on the top right to create a new project and select the video you exported from Lively. Click “Add (1)” on the top right to add it to your project.
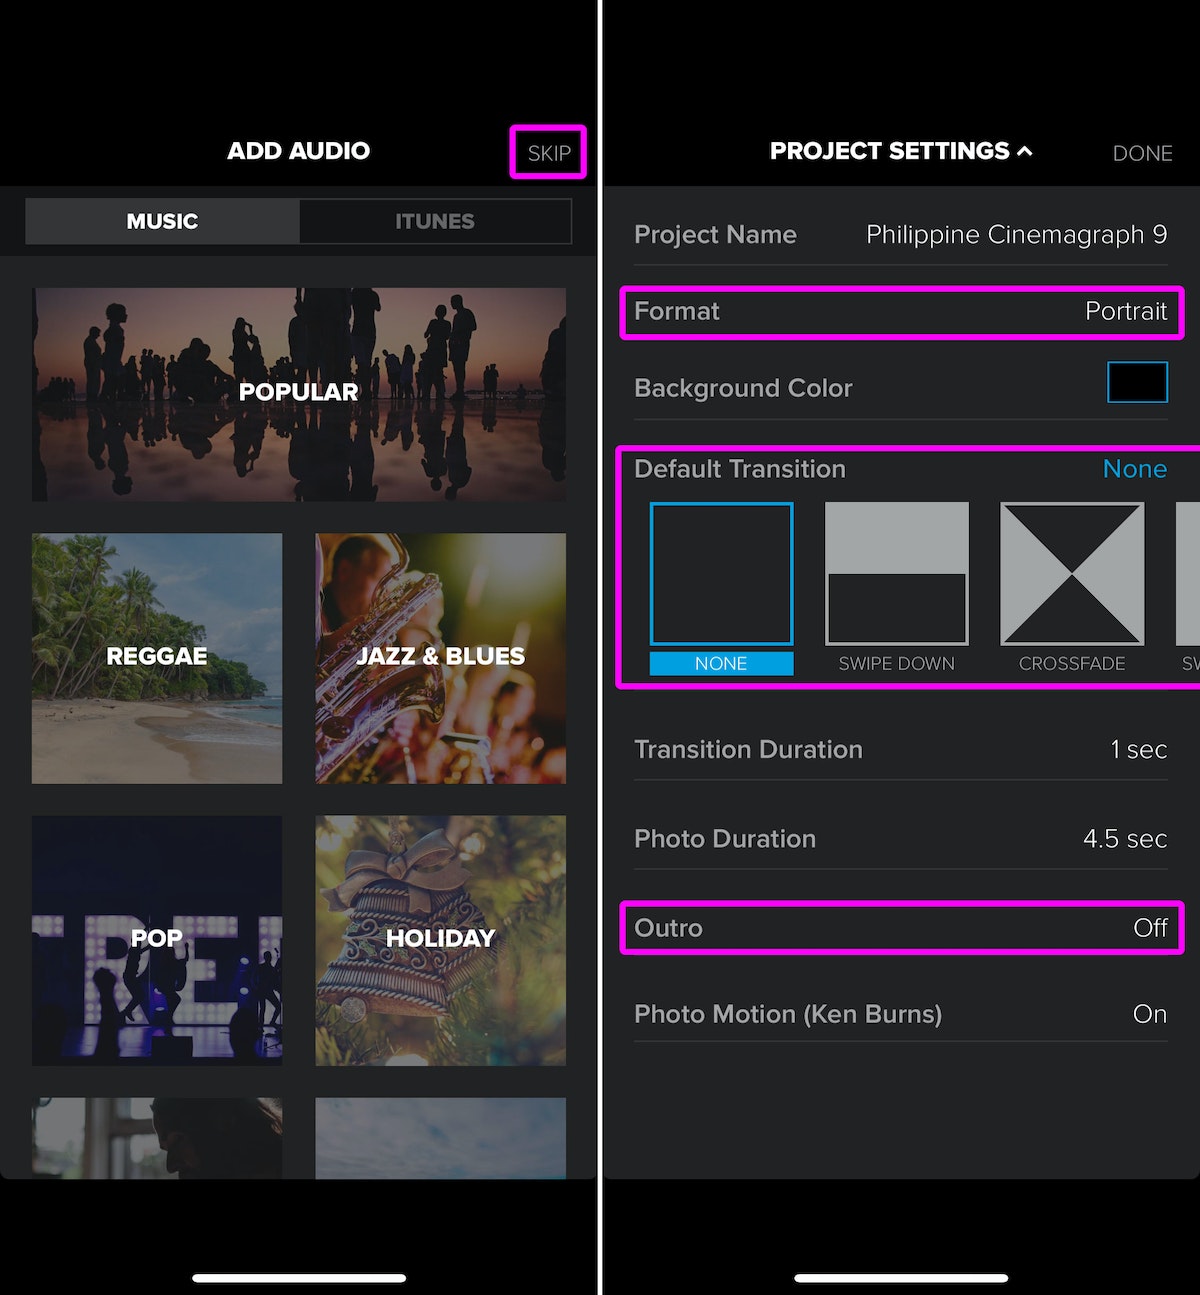
On the Add Audio screen, tap “Skip” on the top right.
Name it however you like, and use these settings:
- Format: Select Landscape for wide photos or Portrait for tall ones
- Default transition: set to “None”
- Outro: set to “Off”
Now you should be in the editing screen; all you have to do is tap your video and select “Duplicate.” Do this three or four times until your video duration is at least 0:05 or longer.
Lastly, tap the “Export” button on the top right and select “Save.” I always pick 1080p HD for the best quality.
3. Video Crop
One last step: Remove the letterbox (those pesky black bars) on the side of the exported video. Open “Video Crop,” tap the big red button, select your video, and tap the check mark on the top right.
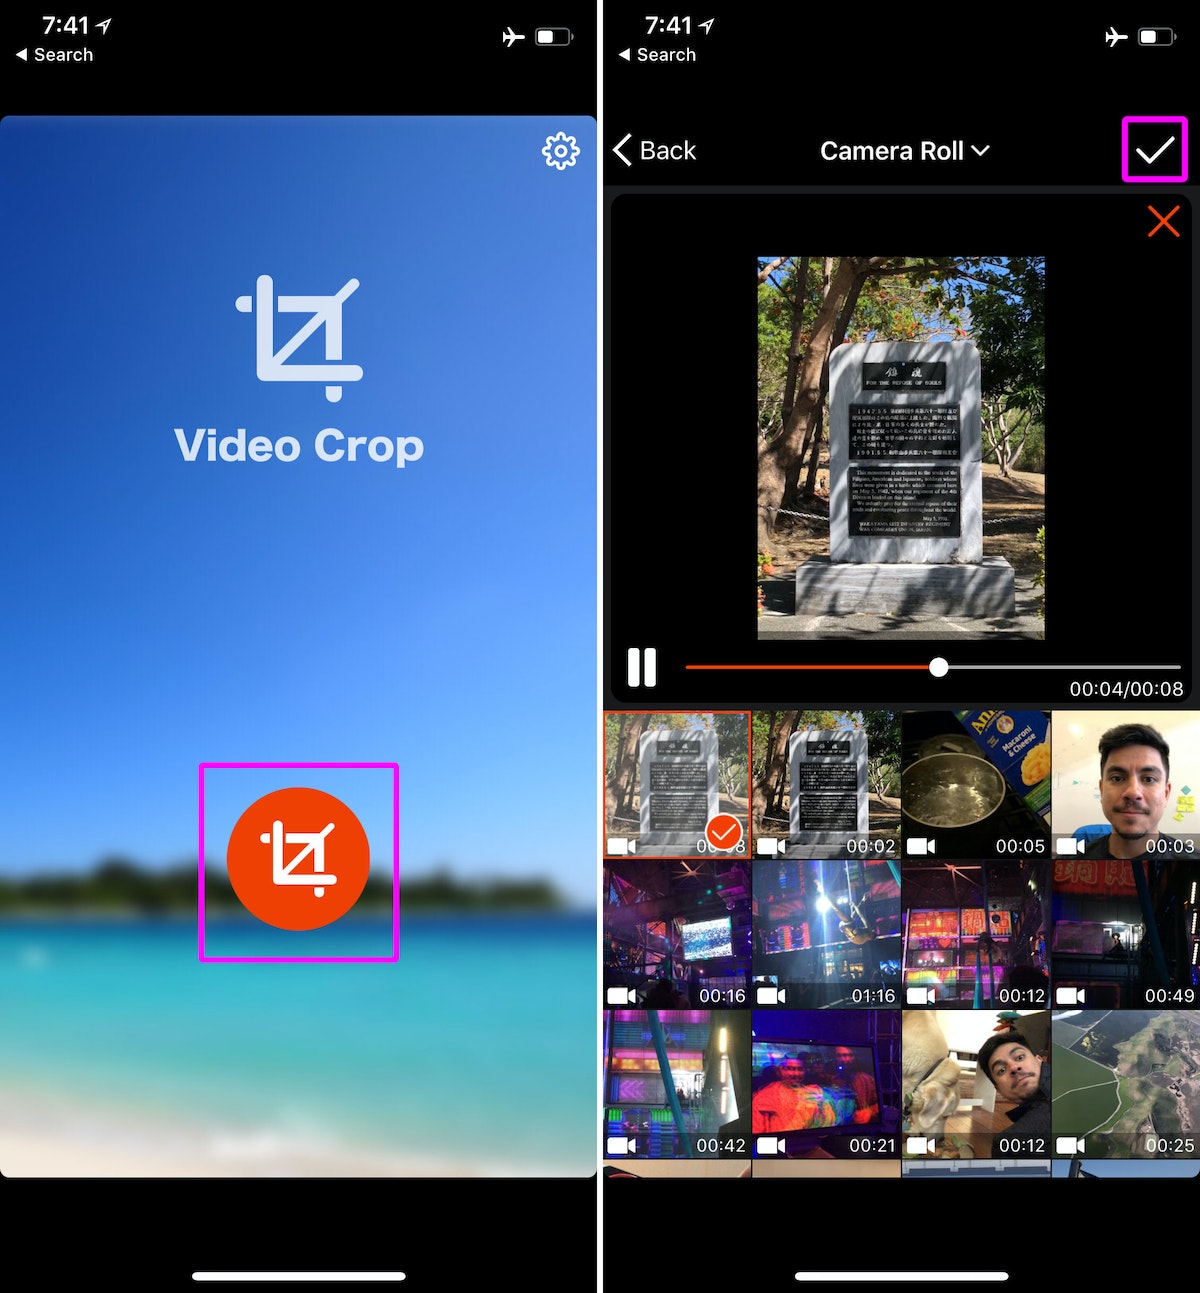
Now use the crop tool to trim off the black bars, then tap the export button on the top right. When it’s done processing, tap “Save.”

Very Instagrammable
Cinemagraph loops look amazing on Instagram or Facebook, and they give you a unique way to share your experiences (Let’s be real—we’ve all seen enough Boomerangs.)
It takes a few steps, but once you get the hang of it, the process is quick and easy. And when your friends ask how you did it, you can point them this way.


Subscribe to the IDEO newsletter
.jpg)
